Quick Start Example
Quick Start Example
It's very easy to begin using the Depot Tool. This example shows how to perform the APX Controller Board
Initialization operation in three steps.
However, before you can begin using the Depot Tool, you must:
- Register with the Depot Tool
- Login to Hosted Depot Website with your IDM account
- Install the Depot Tool Client application
APX Example: Create Default Codeplug
Step 1: Start the Depot Tool Client and Read a Radio
You can access the Depot Tool Client from the start menu or the desktop by clicking on this icon:

Once the Depot Tool Client begins, navigate to the Create Default Codeplug page in APX section from the link on the Home Page.
You can then plug in a radio to the USB port and click on the "Read Radio" option from the Choose Option combobox.
Then, click the Read Radio button. After the radio is read, the rest of the fields will appear and you will be able to click on the Submit Job button.

Figure 1: The APX Create Default Codeplug page in Depot Client
Step 2: Navigate to the Results Page
Click on the Results tab. You should see a row in the table with the name of the operation that you entered in step 1.
Job status is refreshed automatically, so after a while, the status should be set to Completed.
At the end of the job details, three buttons are visible: Download button, Write button, and Remove button.
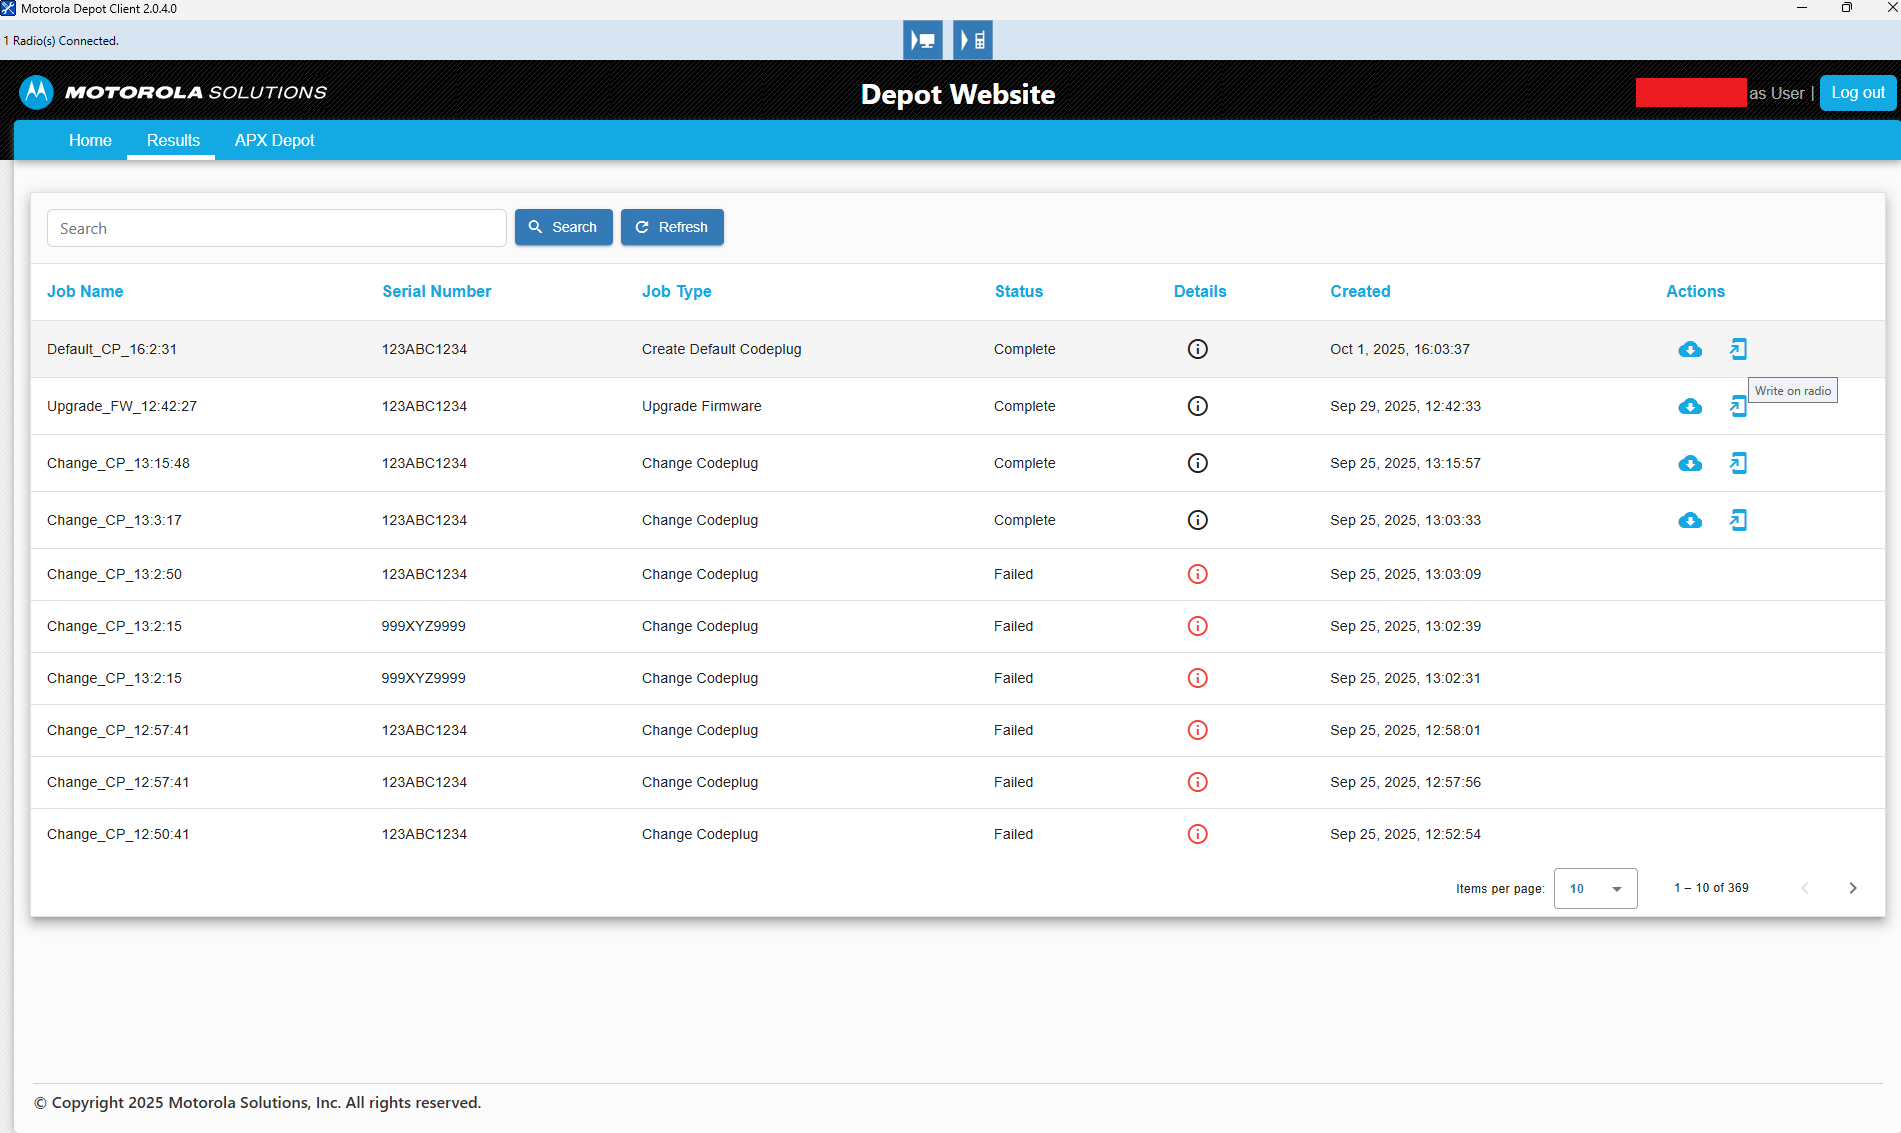
Figure 2: The Results Page showing a successful Create Default Codeplug operation
Step 3: Write the Radio
After clicking the Write button, visible on the screen above, a new codeplug will be written on the radio.